Lesson 8: Composting
Purpose
Composting is a way to turn kitchen and waste materials into a rich amendment for the garden. Composting is also a great opportunity to practice environmental stewardship of the land by improving the structure of the soil, providing plants with nutrients, controlling weeds, reducing the need for watering, and keeping waste out of landfills.
Time Needed
45 minutes to 1 hour
Materials (For 30 Students)
- Compost
- 30 hand lens (3x or 10x)
- 2 trash bins
- Newspaper
- Paper bag or tongs
- Compostable and non-compostable materials (see list of ingredients on next page)
- 3 wooden palettes (or another type of compost bin)
- Nails and hammer (to build the bin)
- Water hose
- Composting thermometer (or a digital thermometer with a wire probe)
- Compost starter
Background Information
Composting is the speeding up of the decomposition process of organic materials by naturally present microorganisms. It is a way to turn kitchen and yard wastes into a substance that, when added to the soil, improves the soil’s physical properties and increases plant nutrients. Microorganisms (bacteria, fungi, and actinomycetes) use carbon, nitrogen, and other elements in the waste materials, which results in the decomposition of the material. There are three main types of composting bacteria: those that start the process, those that take over from the starter bacteria, and those that finish the job. Each operates in a different temperature range.
As carbon compounds are digested, heat is given off. Fungi and actinomycetes break down tougher plant fibers like lignin and cellulose, as well as proteins and starches. Earthworms also play a role by ingesting, digesting, and excreting organic matter as nutrient-rich castings that are used by plants.
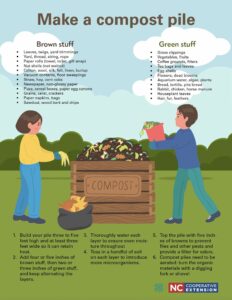
The ingredients for a compost pile can vary. An overall rule of thumb is to create a pile that is moist but not soggy, has sufficient aeration, and has at least a third to a half more carbon than nitrogen materials.
- Carbon materials include dead leaves, ashes, sawdust, newspaper, coffee grounds, and hay.
- Nitrogen ingredients consist of kitchen scraps like banana peels, apple cores, etc, grass clippings, and farm animal manure.
- Add a handful of compost to provide the microorganisms that decompose the materials.
- Avoid charcoal, diseased plants, colored paper, meat, oils, dairy products, pet waste, and non-biodegradable materials (plastics, synthetic clothing, etc).
For more information, read Home and Backyard Composting.
Focus Questions
- What is compost?
- How is it different from the soil?
- How does composting work?
- Why is it good for the garden?
Lesson Slides
Lesson Eight Slides
Click on “File” and then select “Make a Copy” of the lesson four slide deck to use with your youth.
Scratching the Surface
Instructions
- Place small piles of compost on newspaper on the desks in front of the students. Pose a few questions, like “What is the stuff in front of you? Why is it important?”
- Briefly explain the composting process of decomposition of living (or once-living) materials into a soil amendment. What is it made of? How is it made?
- Take a small trash can and fill it with real materials that could be composted and those that cannot (see list of materials below). Put compostable food scraps in a paper bag to easily and safely handle (or use tongs). Tell the students that often we tend to throw away items that we could easily recycle through composting.
- Dump the trash can contents onto a table covered by protective material (newspaper). Ask students to come up and decide whether to put the material in a bin labeled “organic” and destined for the compost pile or a bin labeled “trash” that will end up in the landfill.
- After they have finished sorting, see how much actual trash is left. Compare it with the original pile.
- Ask the students to reflect on the activity. How did they decide what to choose? What happened during the activity? Ask questions like, “Why do you think students had different ideas about what is trash and what is recyclable? How does having fun help you learn? Why is learning with others sometimes more fun than learning alone?” Tell the students they are going to apply the information they just learned by making a compost pile.
Digging In
Instructions
Compost piles can be very easy to create and maintain, and they offer many rewards for students. Have your bin ready to use but show the students how it is put together.
- To build the compost bin, salvage three wooden palettes from a shipping company or a local recycling station. (You could also make a simple chicken wire bin with metal poles.) Nail the three palettes together to form a U-shape, leaving an open side to add recyclables.
- The compost pile itself is similar to a layer cake.
- Have the students help by placing a layer of carbon-rich dead leaves and grass on the bottom.
- Then add a handful of soil or compost (which is full of good composting-starting bacteria).
- Next comes a smaller layer of nitrogen-rich ingredients, like vegetable scraps, fresh leaves, and farm animal manure. (Do not use dog droppings.) The smaller the pieces, the faster they will compost.
- Students can rip and shred ingredients before they add them to the pile. Add alternating layers with the material you have. A good rule of thumb is to use two parts carbon or “brown” material to one part nitrogen or “green” material.
- Use a water hose to moisten the pile, making it not too soggy and not too dry.
- As the bacteria begin to decompose the materials, they give off heat. On cool mornings, students may observe steam rising from the pile. Stick a long compost thermometer (or a digital thermometer with a wire probe) in the middle of the pile, and keep track of the internal compost temperature as well as the outdoor temperature.
- Use this data to create a graph.
- Depending on how active of a composter you are, you could see compost in anywhere from a few months to a year. The finished compost has a dark color and smells like the earth.
- Dig the compost into the school garden to provide nutrients for plants and build the soil structure.
- Ask students questions like
- What happens to the original materials in the compost pile?
- How long does it take for an apple core to compost versus collard greens?
- How does the temperature of the compost pile vary as the outdoor temperature fluctuates?
Compost Ingredient List
Carbon Ingredients (Brown Ingredients)
- Hay or straw
- Sawdust
- Chopped twigs
- Ashes
- Dried leaves & grass
- Shredded paper
- Old potting soil
Nitrogen Ingredients (Green Ingredients)
- Vegetable peelings
- Fruit scraps
- Coffee grounds
- Garden trimmings
- Egg and nut shells
- Manure
- Fresh grass clippings
Ingredients to AVOID
- Pet waste
- Dairy products
- Ingredients with fats or oils
- Meat or fish scraps
- Weeds with seed heads
- Diseased plants
Different types of Compost Bins
Rhonda Sherman, NC State Extension Specialist for compost, shares the different types of compost bins and how they work.
Digging Deeper
Instructions
Composting can be hard to understand since students cannot see the microbes that break down organic matter. If you have access to a compound microscope, show students how to make slides of the compost. Carefully put a small amount of compost on the slide. Using a water dropper put one or two drops of sterile water on the compost.
Make sure you create a thin layer so the light can pass through and illuminate the microorganisms. Apply the coverslip and start observations on low power, working to higher magnifications. Larger invertebrates can be identified, including nematodes and flatworms. The smaller microbes like fungi and bacteria will be a bit fuzzy.
Weighing Compost – Instructions
Compost can dramatically reduce the amount of material going into the landfill, but how much?
- Record the amount of materials the students throw away at lunch for one week. After the composting lesson, have them keep track of what they put in the compost pile and weigh the remaining trash. (NC Math Competency: 2.02).
- Ask students questions like, “What is the difference in weight? How could you further reduce the amount of waste being thrown away? Do you bring your lunch in reusable bags? Can you pack your food in reusable plastic containers?
- Brainstorm ways to involve the entire school in a composting effort. For a schoolwide project to eliminate waste, consider composting in the cafeteria. For more information, visit Vermicomposting for Schools.
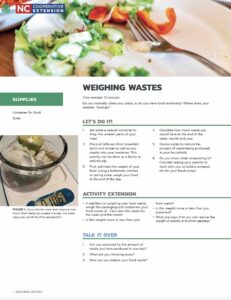
Weighing Wastes
Dig into measuring your food waste with this quick activity. All you need is a scale and your food scraps.
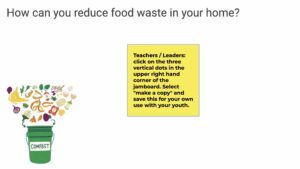
Waste Reduction Brainstorm Jamboard
Ask your students what ideas they have to reduce waste in their own homes? Share your ideas on this jamboard.
Compost in a Bag – Instructions
Composting in a bag lets every student closely observe the composting process.
- Have each student bring in a gallon, resealable bag filled with compostable kitchen scraps like vegetable and fruit peelings, bread crusts, coffee grounds, or tea bags.
- Encourage them to bring in yard scraps, as well, like grass clippings and dry leaves.
- You may want to bring in extra ingredients to supplement. (See the compost ingredient list). Add compost starter in the form of a handful of compost, alfalfa meal, or commercially available compost starter from a local garden store.
- Have the students put their ingredients on a piece of newspaper and tear the ingredients into small pieces.
- They should put the small pieces back in the bag. Be sure to have a rough ratio of two parts brown (carbon) to one part green (nitrogen) ingredients.
- Add about two tablespoons of water and seal the bag.
- Students should massage their bags every day to speed up the decomposition process by further breaking down the materials.
- Open the bags each day for a few hours to allow oxygen to filter into the compost. The composting process should be completed in four to six weeks. Have students add their finished compost to a garden or indoor potted plants.
Soda Bio-Reactor – Instructions
Cornell University developed a lesson on small-scale composting. By using soda bottles students can design their own experiments manipulating variables like ingredients, temperature, and moisture to find out the effects on composting rates. Visit Cornell’s Web site for a complete lesson.
NC State’s Composting Facility Tour
Americans waste between 30–40 percent of their food. Imagine for every ten bites you too, you threw away 3-4 bites. That is a lot of food going into the landfill. More wasted food is in landfills than anything else that is thrown away. Composting is one way families can close the loop on food waste. Composting is a natural process where microbes break down food particles into a rich, useful, soil amendment for gardens.
NC State University set a goal of redirecting 70 percent of their waste – either composting, recycling or reducing waste. The Compost Facility takes food from Talley Student Center, student dining halls, our greenhouses and other places and composts it and reuses the compost on campus landscapes and farms!
Read more here: https://recycling.ncsu.edu/compost-facility/
Assessment
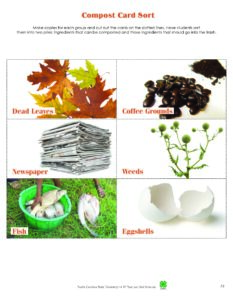
Compost Card Sort –Instructions
- Divide students into small discussion groups and have them organize cards into two categories: compostable and non-compostable.
- You may have them further subdivide the compostable ingredients into Carbon ingredients and Nitrogen ingredients.
- Have the students share with the whole group their justification for separating each card into a specific category.
- Create a chart on the chalkboard for the whole group to follow along.
- Students may also come up with additional ingredients.
- Areas of disagreement tend to evolve into good conversations.
Compost Sort Cards
Print, cut, and laminate sets of these cards for your students to use.
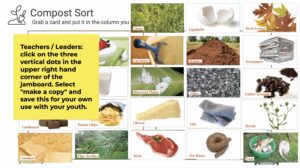
Compost Sort Jamboard
Use this jamboard to virtually sort materials into compostable or non-compostable.
Hand out to your students as an alternative to the sort cards. The downloadable PDF is fillable if printing is not available.
Review answers and compare with students’ answers to grade them.
Beyond the Garden Gate: Activities to do at home
Worm Bin
Special worms called ‘red wigglers’ are also great at making compost. They love to eat your rotting lettuce and leftover apple cores. Visit the NC 4-H Web site to download instructions on building a worm bin.
Vermicomposting
Join Morgan King with Brunswick County Cooperative Extension as she shares why vermicomposting is so great!
Compost Gin
Compost Gin is a fun card game that you can play to learn more about how to compost and the ingredients needed to make compost. Created by Stan Slaughter, buy it at Compost Gin.

