Lesson 1: Soil Properties
Purpose
Using skills of observation, comparing, classifying, and communicating, students will discover the different characteristics of soil and how soil properties impact their daily life.
Time Needed
1.5 hours or two 45-minute sessions
Materials
(For 30 Students)
-
- 30 paper cups
- 8 trowels (or soil probes)
- 30 magnifying glasses
- Newspaper (to limit the mess)
- Paper, pencils
- 30 clear, 20-oz. soda bottles
- 2 cups powdered dish detergent
- Rulers
- 1 basketball, 1 golf ball, 1 BB pellet
- 1 water spray bottle
- Funnel
- Masking tape
- Overhead projector & Dissecting Microscopes
Background information
Soils are important, from the growing of our food and favorite ornamental plants to providing the materials to build the houses we live in, filtering impurities out of our water, helping us recycle wastes, and providing recreational activities we enjoy. Soils contain four parts: weathered minerals, organic matter, water, and air.
Soil texture refers to the proportion of sand, silt, and clay particles. Texture affects many fundamental soil properties, such as fertility, erosion, water-holding capacity, pollution, and compaction. Soil color can reflect the different mineral content, aerobic or anaerobic conditions, and the presence of organic matter.
Humus is the organic part of the soil that results from highly decomposed plant and animal matter. Humus contributes to nutrient exchange with plants and helps bind soil particles into aggregates. Humus also holds water well and, therefore, improves drought tolerance.
Focus Questions
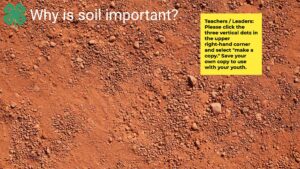
- Why is soil important?
- What does it look and feel like?
- Why are there differences between soils?
Lesson Slides
Lesson Slides
Click on “File” and then select “Make a Copy ” of the lesson one slide deck to use it with your youth.
Scratching the Surface
Instructions
Begin with a brainstorm about soil’s importance. Have pairs of students list as many ideas as they can on how soil is important in our daily lives. After a few minutes of cooperative brainstorming, ask for volunteers to voice their ideas.
Collect the ideas by writing them down on a piece of large paper hanging on the wall or a bulletin board. Use this as your “Soil Wonder Wall.” Students will use this space to add to their initial list of ideas and as a place to record questions.
Think about engaging students in recognizing their work together as a group. Leading questions might be: Do you think you get more ideas working alone or in a group? Why? How did you decide what roles your group members would play? What did you learn about communicating with others?
WonderWall Jamboard
Use this virtual whiteboard to share ideas about why soil is important!
Please click the three vertical dots in the upper right-hand corner and select “make a copy.” Save your own copy to use with your youth.
Digging In
Instructions
Break the class into teams of three. Go outdoors and ask the students to help you identify three unique spots for soil samples. Ask them why a location may have different soils. You may want to define a unique spot as the edge of the playground where wildflowers grow, a compacted place beneath play equipment, on the soccer field, etc. Demonstrate how to take a soil sample with this Careful Soil Sampling document.
At each stop, have one teammate fill a paper cup with soil. Bring the samples into the classroom and pour the samples onto pieces of newspaper for observation. (Students may also want to share soil samples brought from home.) Use magnifying glasses and dissecting microscopes for a closer look.
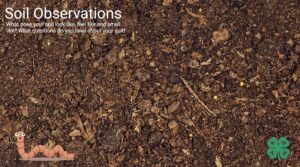
Have students record their descriptions and sketches of each soil. What does the soil feel like? What does the soil look like? Is it heavy? What color is it? Is there evidence of plant material or other living materials?
Encourage students to write down questions or interesting things they find in their soil explorations and put them on the Soil Wonder Wall. Take time for reflection about student findings and their questions.
Wonder Wall Jamboard
Encourage your youth to share their soil observations on the second page of this jamboard.
Soil Observation
Watch this short video to grow your soil observation skills.
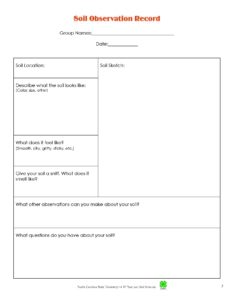
Soil Observation Record
Use this soil observation record to document your soil exploration!
Digging Deeper
Hand Texturing – Instructions
Hand texturing is a field exercise soil scientists use to determine soil texture, or whether the soil is made up of sand, silt, or clay.
Have students take an egg-sized soil sample, and spray it with water to lightly moisten it. Have them knead the soil. If it is too dry, and completely falls apart, spray more water. Conversely, if it is too wet, add dry soil.
- Sand tends to have a gritty texture, like salt or sugar, and it falls apart when squeezed into a ball.
- Soil with a lot of silt has a silky feel, similar to flour.
- Clay tends to be sticky and greasy, and it easily forms a ball. Most soils have varying amounts of these particles and will have a combination of the properties.
Once you have a moist soil ball, gently press your thumb and push the soil over your forefinger into a ribbon.
The longer you can make your ribbon, the higher the clay content. Clayey soil can ribbon out or three-fourths of an inch or greater. If your ribbon is short (less than three-fourths of an inch) and cracks, the soil is considered to have a loamy texture (usually containing varying amounts of sand, silt, and clay).
Show the soil texture key (found at the end of the lesson) to your students.
As a whole class, work together to figure out the soil texture. Does it match with the previous finding? Why is soil texture important?
Rarely are soils ever composed of one size of soil particle, but if a teacher has access to separate samples of sand, silt, clay, and humus, the students can further their soil sample observations by feeling and looking closely. Students should record any descriptions and sketches they make.
Soils are composed of particles of different sizes:
- Sand (.05 to 2 mm)
- Silt (.002 to .05 mm)
- Clay (smaller than .002 mm)
- Humus (decomposed organic matter)
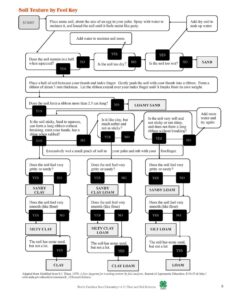
Soil Texture by Feel Key
Use this key to try and determine what kind of soil you have.
Soil Ribbons
Learn how to make a soil ribbon and determine what kind of soil texture you have.
The Soil Shimmy – Instructions
- To determine what soil particles make up the collected samples, have students use a funnel to put at least a half cup of soil into clear 20-ounce plastic soda bottles. You may want to have them put their name on a piece of masking tape and adhere it to the bottle.
- Have them add a tablespoon of powdered dish detergent in with the soil, and fill the bottle with water. (Dish detergent clings to the soil particles, helping to separate them.)
- Secure the bottle cap, and have the students dance around and shake the bottle vigorously for at least two minutes.
- Have them place their bottles in a location where they can sit undisturbed for 24 hours. The soil should settle out from bottom to top in layers of sand, silt, clay, and organic matter, respectively.
- Ask the students what they observe. Which layer has the most? Which layer has the least? How does this compare to when you hand textured? Why is some water still murky?
Soil Shimmy
Watch this quick video on how shimmy and shake your soil!
Soil Particle Play – Instructions
Each soil particle is a different size. To show the differences between a sand particle, silt particle, and a clay particle, start with a basketball, golf ball, and a BB pellet. Tell students that the basketball represents a sand particle, the golf ball symbolizes the silt, and the BB denotes a clay particle.
- To illustrate the relationship between particle size and the pore spaces or places between the soil particles, tell the students they will be performing in the great Soil Particle Play!
- Begin by having the students stand up in a cluster and spread their arms out and position themselves fingertip to fingertip. Have the students drop their arms and tell them that they are sand particles. Explain that all the room in between them is occupied by air, which allows plants and animals to thrive and also allows water to travel through soil.
- Set the scene and tell students that you, as the gardener, need to water the soil and must pick a student to be a water drop. Ask the student volunteer to wind his or her way through the students. Ask the students for responses on how easy or hard it was for the water drop to make its way through the soil.
- Next, have the students spread themselves out elbow to elbow and then drop their arms. This scenario shows the smaller spaces between silt particles. Ask the students what they observed and how this might be important. Have the water drop, wind his or her way through again.
- Finally, the students should stand almost shoulder to shoulder, showing clay particle spacing. One can notice that water would have to move much slower to make it through the pore spaces and that clay creates a challenging situation for plant roots to grow.
As a final act in the Soil Particle Play, divide the students into groups based on the average soil particle findings from the Soil Shimmy exercise. For example, if most of the soil was three-fourths sand, take three-fourths of the students and assign them to be sand particles.
The remaining particle percentage might have been one-eighth clay, one-eighth silt. Divide the remaining students accordingly. Have the students space themselves and make comments on the arrangement. Is there space for roots to grow? Will the plants get enough air?
You may decide to do other scenarios, like demonstrating compacted soil or how compost can help soil structure. (Compost creates clumps or aggregates of soil with space between.)
Ask students what they learned through this activity. Why was this a fun way to learn about soils? How does having fun help you learn?
To summarize the soil properties exercise, reflect with students on the experience. Why is it important to know about soils? How have soils been important in your life? What did you learn from this activity that you didn’t know before? What made this a good activity? How can the things you learned be used in other situations? What other ways could you apply the skills you gained in this activity?
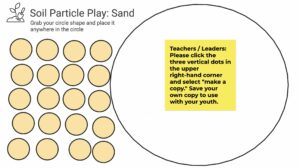
Soil Particle Play – Jamboard
Use this jamboard to engage youth in the soil particle play if you are leading virtual learning.
Teachers / Leaders: Please click the three vertical dots in the upper right-hand corner and select “make a copy.” Save your own copy to use with your youth.
All About Soil
Enjoy this video on the importance of soil.
Assessment
Soil Wonder Wall Questions
Student-generated questions allow you to make judgments about the number, quality, and range of questions produced. Questions reveal student understanding about the topic. They show what students are interested in knowing more about, and they also reveal the level of thinking required to ask the question. Encouraging students to write down individual and group questions on the wonder wall gives you a permanent record of their thoughts. You may also include the questions they ask out loud.
Using Bloom’s taxonomy, questions can be separated into categories from simple basic information questions to higher-level wonderment questions. Basic information questions include knowledge or factual questions, which usually only require a recall of information and are often closed questions, usually based on an observation they made. Questions like, “Why is this soil red?” are basic information questions.
Procedural questions seek clarification about how a given task or procedure was carried out (Chin, et al, 2002). Examples might include: How do I take a soil sample? How do I set up the Soil Shimmy?
Wonderment questions are pitched at a conceptually higher level. According to Chin, (et al., 2002), ”They require an application or extension of taught ideas, and focus on predictions, explanations, and causes instead of facts, or on resolving discrepancies and gaps in knowledge.” These questions fall into Bloom’s categories of comprehension, application, analysis, synthesis, and evaluation.
When trying to evaluate the questions, use the following:
- Comprehension questions typically seek explanations of things not understood (Chin, et al, 2002). Example: Why is clay stickier than sand?
- Application questions use previously learned information in new and concrete situations to solve problems that have single or best answers (Krumme, 2003). Example: If sand doesn’t hold much water, how does it support plant growth?
- Analysis questions break down and organize information into its component parts and develop conclusions by recognizing patterns and finding evidence to support generalizations. Example: I know clay soils can be hard for plants to grow in, yet plants still do. Are there plants for clay soils?
- Synthesis questions creatively apply existing knowledge and skills to produce an original whole.
- Evaluation questions judge the value of material based on personal opinions and values.
Questions can reveal student understandings and curiosity and can play a significant role in encouraging further scientific discovery.
Wonder Wall Jamboard
Use the third page for soil wonder wall questions.
Beyond the Garden Gate: Activities to do at home
Dirt Shirts – Instructions
Find a clean, washed, white t-shirt that you won’t get you into trouble when you dye it with dirt. Gather enough soil to fill the bottom of a bucket. Red clay works very well, but you may want to try other soils, like a humus-rich black or gray soil. Make a mud slurry by adding some water to your soil in the bucket. You want it to be a little thinner than a mud pie.
To make a tie-dyed dirt shirt, tie rubber bands tightly onto the shirt. Put your shirt into the mudpie mixture, and mix it in really well. Let it soak for at least four hours or even overnight. Take your shirt out of the bucket and wash it off, preferably outside using a garden hose. Let your shirt dry outside, and then rinse it again in cold water. Dry the shirt in a hot dryer to set the color. The color will fade over time, but you should end up with a glorious shirt from the garden!
Soil Crayons – Instructions
Soils across the country and even in the state of North Carolina come in different colors. Some Native American cultures used colorful soil for pottery, makeup, and paint pigments. You can create your own artistic expressions with soil crayons. The U.S. Natural Resources Conservation Service has created a procedure that is easy to follow with an adult’s help. Visit USDA – Natural Resources Conservation Service Soils

