Lesson 7: Salad Bowl Experiment
Purpose
Students will learn what plants need in order to grow and how to measure growth quantitatively, by collecting numerical data and qualitatively, through using their personal justifications. They will determine the “best” salad greens to grow in their classroom, based on their observations of plant performance in known environmental conditions.
Time Needed
1 to 1.5 hours followed by 10 minutes once a week for data collection
Materials (For 30 Students)
- 6 different varieties of salad greens. Try to include lettuce, as well as other greens like kale, collards, chard, beet greens, and Asian greens like tatsoi, pac choi, mizuna. (Some favorites are Mizuna ‘Kyona’, Arugula, Kale ‘Red Russian’, Lettuce ‘Freckles,’ ‘Rouge D’Hiver,’ and ‘Tango’.)
- 6 6-inch pots
- Peat-based potting media
- 6 Labels
- 1 light bank (optional, but preferable)
- School garden bed for planting (optional)
- Thermometer
- Ruler with centimeters
Background Information
A tremendous number of salad greens can be easily grown in a minimum amount of time. Different salad greens have unique characteristics. Some have red leaves, some have a bitter taste, some are disease resistant, and some have freckles. They also have a number of nutritional qualities. This is an evaluation experiment to see how the different varieties perform based on given environmental conditions.
Focus Questions
- What is a salad green?
- What does it need to grow?
- What are the environmental factors in our classroom?
- What are the environmental factors outside in our garden?
- How can we determine “the best” salad green to grow and eat?
Lesson Slides
Lesson Seven Slides
Click on “File” and then select “Make a Copy” of the lesson four slide deck to use with your youth.
Scratching the Surface
Instructions
Begin the Salad Bowl Experiment by posing the following scenario: “News Flash: Kids will grow greens for their school lunches. They will be able to graze from the garden and dine on gourmet salad greens they have grown themselves!”
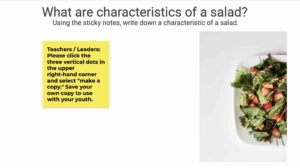
Ask students if they were to grow salad greens, what would they like to grow? Brainstorm characteristics that the students would like to find in their salad greens.
Characteristics might include:
• Texture: crunchy, slimy, crisp
• Taste: spicy, sour, bland
• Pest resistant
• Disease resistant
• Shade tolerant
• Fastest growing
• Goes well with other veggies
News Flash Salad
Watch Crystal Starkes, 4-H agent with Union County Cooperative Extension, share how to get started growing some salad greens!
Salad Characteristics – Jamboard
Teachers / Leaders: Please click the three vertical dots in the upper right-hand corner and select “make a copy.” Save your own copy to use with your youth.
Digging In
Instructions
Introduce the students to the different types of greens they will be growing by writing their names on the board. Based on your selection, use the seed packet information to tell students what is special about each green. For example, Arugula is really spicy and Asian greens can be sweet and ‘Tango’ lettuce might make you want to dance! Try to include different salad greens like, arugula, kale, mizuna, other Asian greens, etc. For seed source recommendations, contact your local county horticulture Extension agent (or refer to the Resource appendix).
Tell the students that plant growth depends on the environmental conditions in which they are grown. As a group, discuss how environmental conditions inside the classroom or in a school garden might affect the salad greens’ growth. Write these ideas on the board. Ask them for suggestions on how to measure temperature, light, water, and nutrients. You might consider using the following methods:
- Temperature: Use a thermometer to determine temperature.
- Light Quantity: It is okay to use a rough estimate of shade, part shade, or full sun. Plant scientists use a special instrument to measure light.
- Moisture: If growing salad greens in the classroom, monitor water input. For the outdoor garden, measure precipitation by using a rain gauge.
- Nutrients: Refer to the Soil & Plant Growth lesson to determine how to measure soil nutrients.
Have the students write down a personal hypothesis about how they think the salad greens will grow given the existing environmental conditions. For example, which lettuce will grow the fastest, which will have the best color, texture, resist the most pests, etc.
Example Hypotheses:
- I think ‘tango’ lettuce will grow the fastest.
- I think that collards will have the best texture.
- I think kale will have the most interesting color.
Farmer’s Market
Watch this video of a visit to a local farmer’s market and discover how local, fresh salad greens have so many flavors.
Lettuce Experiment
Watch as Crystal Starkes shows us how to prepare the soil and sow our seeds for the salad bowl experiment.
Meet the Seeds
Use these slides to guide your understanding of what seeds need to grow and make a hypothesis on which will grow the “best.”
Digging Deeper
Instructions
After seedlings emerge, qualitative and quantitative data should be recorded. Ask students what information or data should be collected to determine the “best” lettuce.
Students may consider measuring the following:
- Plant height
- Leaf number
- Leaf shape
- General observations
- Amount of germinated seeds
- Number of flowers
- Number of insects
- Leaf color
Data should be recorded once a week through the duration of the experiment. You can grow salad greens for as long as you like, but typically plants can be ready to harvest in about 6-8 weeks. Sample data collection sheets are included in the appendix. You may also download them from the 4-H Plant and Soil web site, so you
can adjust them according to the data your class is collecting and the plants you end up growing. Sample data sheets can be found at the end of this lesson.
On the final data collection, students get to enjoy a salad bonanza! Harvest the salad greens by allowing students to use scissors to cut just above the growing point (about ½” above the soil) of the plants. The salad greens will grow back if they are not cut all the way down. Arrange the students into groups of six, with each type of salad green in each group. To record the taste-test data, establish a 5-point rating scale. For example:
- Outstanding! This (fill-in-the-blank) salad green is absolutely delicious; I will graze on it at every opportunity.
- Good. This (fill-in-the-blank) is pretty good. I could eat this again (maybe with a little ranch dressing).
- Average. This (fill-in-the-blank) green is just okay. I don’t love it, but I don’t hate it.
- Poor. This (fill-in-the-blank) is not tasty, but I am tough so I tried it.
- Unacceptable! This (fill-in-the-blank) is totally disgusting. I cannot stand it and cannot see myself eating it again!
Chart the taste ratings for each green as an entire class into a bar graph. Talk about what the graph shows. Which greens tasted the best? The worst? What was the average taste rating for each variety?
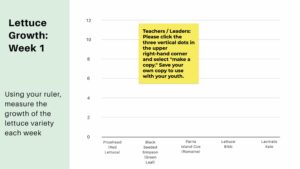
Another important graph to make would be the measure of plant growth over time. Create your horizontal x-axis as time (number of days) and your vertical y-axis as height (in centimeters). Ask students to call out data for each point that you are graphing. Use a different color marker to
chart each salad green. Which variety grew the fastest? The slowest? Why? How do you think environmental conditions changed how the plants grew? Graph any other information as appropriate. From these graphs draw conclusions by having each student identify his/her favorite green and justify their selection. Their rationale might be based on taste, plant growth, or the characteristic they were most interested in seeing in their salad green. (North Carolina Math Competency: 4.01)
- How did you decide what to choose?
- What steps did you go through before you made your decision?
- What was the most difficult part of the experiment?
- How will learning about experimental design help you in other situations?
- What are some ways that you like to learn?
- What would you do differently if you did this experiment again?
Salad Bowl Experiment – Data Collection Jamboard
If you prefer to collectively map your data together, consider using this jamboard as a way to collect data.
Teachers / Leaders: Please click the three vertical dots in the upper right-hand corner and select “make a copy.” Save your own copy to use with your youth.
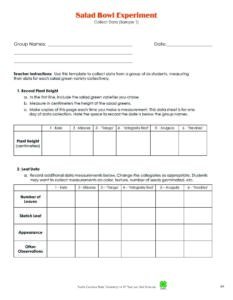
Salad Bowl Experiment – Data Collection
Use this student handout to collect data on the growth of your salad greens.
Assessment
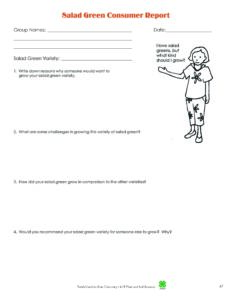
Salad Green Consumer Report
A consumer report is a creative way to communicate the student findings from their salad green scientific inquiry. It shows the observations students made and the conclusions they drew. A report will also help students share information in a meaningful and relevant way. They can present their finished report to the school garden committee or home garden groups, recommending their favorite varieties. (NC Language Arts Competency: 4.02)
Divide students into groups based on the salad green variety they grew. Have the students record their findings in the Consumer Report Outline (at the end of this lesson) and present it to the class. Encourage them to “sell” their variety, attesting to the positive features and perhaps giving warnings of some of the “challenges” of the variety.
Salad Greens Consumer Report
This student handout captures what students liked best about their salad bowl experiment.
Salad Bowl Experiment – Consumer Report Jamboard
Use this jamboard as a quick and interactive way to create notes for your salad green consumer report.
Teachers / Leaders: Please click the three vertical dots in the upper right-hand corner and select “make a copy.” Save your own copy to use with your youth.
Beyond the Garden Gate: Activities to do at home
Salad Square Foot Gardening – Instructions
Grow your own salad green garden in just one square foot! The concept of square foot gardening comes from a gardener named Mel Bartholomew. He encourages beginning gardeners to start out simple by building raised beds and planting in square foot sections. Have an adult help you make a 12-inch square mini-raised garden from non-treated wood that is 6 inches deep.
You could also find a pot, preferably a square one that measures about 12 inches across. Put weed cloth on the bottom of your square and set it in your yard or patio.
Square Foot Garden Plant Spacing
Fill your square or pot with a soil mix of 1/3 good compost, 1/3 peat, and 1/3 vermiculite. Mix in water thoroughly, and add more of your soil mix if needed. For plant spacing, use the diagrams to the left.
Once your plants are ready, harvest, enjoy, and plant again!
1 plant per square:
- Broccoli
- Cabbage
- Pepper
4 plants per square:
- Lettuce
- Swiss Chard
- Parsley
9 plants per square:
- Beets
- Spinach
- Turnips
- Most Salad Greens
16 plants per square:
- Radish
- Carrots
- Onions
Square Foot Gardening with Paper Towels
Join Liz Driscoll with NC State Extension as she shows you how to space your veggies using a strategy called square foot gardening.
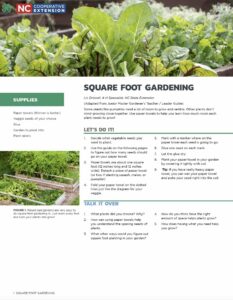
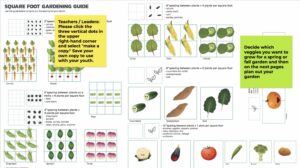
Square Foot Gardening Handout
Dig into square foot gardening with this handout. Determine what veggies you would like to grow and this guide will help you plan your seed spacing for the garden.
Square Foot Garden Planning Jamboard
Use this jamboard to do all your square foot planning for a spring or fall garden.
Teachers / Leaders: Please click the three vertical dots in the upper right-hand corner and select “make a copy.” Save your own copy to use with your youth.

